How to make your film look professional
1 – Depth Of Field
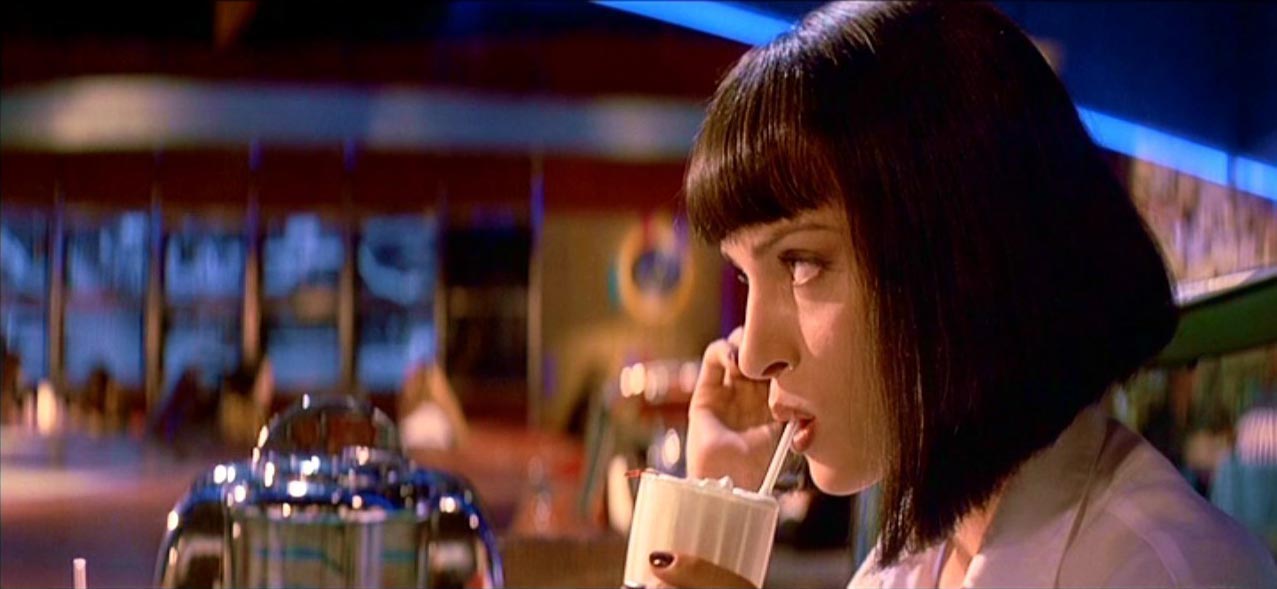
Many new filmmakers think that having a shallow Depth Of Field (DOF) is the single most important element in achieving a film look, hence the popularity of DSLR’s and other interchangeable lens cameras. For those of you that are new to this, DOF refers to the amount of the image that is in focus. Traditionally, feature films have made use of a shallow depth of field to selectively focus the attention on a person or object. Take a look at the photo below and note the areas in focus and those that are out of focus, drawing your eye in to the important part of the frame -
While I do agree that being able to achieve shallow DOF is necessary, it’s not by any means the most important variable on this list. In fact, since the early days of cinema there have been many films that used deep depth of field to their advantage as well. One of these films is arguably the best film of all time, Citizen Kane, which has some of the deepest DOF shots I have seen to date -

Ultimately DOF is a stylistic choice that you have to make based on the look you want to achieve with your film. With that said, the majority of feature films today utilize a shallow DOF on many shots, and if you want to get that look you’re going to need a camera and lens that can achieve it. For starters, DSLR’s or any other interchangeable lens cameras are typically quite good at achieving this look. The larger your sensor, the shallower your DOF will be, so a Canon 5D for instance would have a shallower DOF than a Lumix GH3 as the sensor on the 5D is larger. The other variable to consider is your lens choice. Longer lenses will always give you a shallower DOF than wider lenses. And fast lenses (for example lenses that are F2.8 or lower) will also help out with achieving this look. The more wide open you are on your lens, the shallower the DOF. So for instance if you are shooting on a 50mm lens at f1.4, your image will have a more selective focus than the same lens at f8. Be careful not to overdo this though, because one of the giveaways of DSLR footage today is footage that has too much of a shallow DOF. You want to find just the right balance.
2 – Frame Rate
This is an easy one – Shoot at 24 frames per second. Or at 24p on your camera. Since the earliest days of film, movies were shot and projected at 24 frames per second, and viewers have grown accustomed to this frame rate. Make sure that your camera is always set to this mode, unless you need to shoot at a higher frame rate to achieve slow motion. For example you may want to shoot at 60 frames a second so you could later slow it down to 24 frames a second while editing, and your footage will then play at 40% of the speed.
The main giveaway that your film was not shot at 24p is the lack of motion blur. Video footage is very clinical and sterile looking, and can be almost too perfect at times. Older video camcorders only shot at 59.94i (which is about 30 frames a second) and it created a look that was very realistic looking, but not cinematic. If someone were to walk through the frame for instance, every last frame of the footage would be perfectly clear. This sounds like it would be ideal, but it’s actually not. Real film exhibits motion blur when an object is moving through the screen, and in order to get that organic motion blur on your footage, be sure to shoot at the right frame rate. The film “The Hobbit” was shot at 48 frames per second and as a result many viewers did not enjoy watching the film. It looked too much like video and not enough like the surreal world of film. Here is a shot from “Pirates Of The Caribbean” exhibiting some normal motion blur:

3 – Shutter Speed
Make sure that you use the 180 degree rule when setting your shutter speed. This means when you set the shutter speed on your camera, set it to exactly double that of your frame rate. So if you are shooting 24p, make sure your frame rate is at 1/48 or as close as possible. Many DSLR’s only have a 1/40 or 1/50 setting, so experiment with those two options and see what looks best to you. Most cameras will work better with 1/50, but some (The Lumix GH3 for example) actually seem to work better at 1/40.
Having the wrong shutter speed can be pretty detrimental to your footage. If it’s too slow (1/20 for instance), your footage will look like it is strobing and ghosting as images trail off throughout the screen. And if your shutter is too high (1/100) your image will look like it’s been speed up, almost as if it’s in fast forward. It’s important to note that there are times that you do want to set the shutter speed at an unusually high or low setting, and even when shooting on film, this is a technique that is sometimes used to get a desired stylistic effect. But for 95% of what you shoot, the chances are you’ll want to stick with the 180 degree rule. This also means that if you shoot at a higher frame rate for slow motion (60p let’s say), than you will need to set your shutter accordingly. In that example it would be set at 1/120.
4 – Camera Movement
Not enough filmmakers seem to pay attention to this, but camera movement is definitely one of the most important aspects of getting a film look. Camera movement can include everything from sticking your camera on a tripod and deciding to have no movement at all, to going handheld, to putting your camera on a jib and getting a crane shot. There isn’t a specific movement that will make your film look more cinematic, but the more importance you place on camera movement, the more cinematic your film will feel. Some indie films suffer from very poor camera movement and may contain scenes that are partially shot handheld and partially on a tripod. This will make your film very difficult for your viewers to watch.
Also, make sure that you choose the right type of camera movement for each scene. If your scene doesn’t call for handheld work, than don’t shoot it that way. It will only cheapen the look of your final product and make the audience feel less connected to your piece as the visual elements are not properly tied together with the narrative storyline and flow.
5 – Don’t Blow Out The Highlights
A big giveaway of digital footage are blown out highlights. Since most digital cameras have much less dynamic range than film, the are prone to clipping or blowing out the bright areas of the frame. On film, when this happens, it’s actually fairly pleasant to look at, and many directors, like Stephen Spielberg for example, actually intentionally will blow out some shots to get a stylized effect -

Unfortunately on video, blown out highlights look really bad. The light doesn’t bloom or roll off the same way that it does on film, and your image starts to look very harsh and synthetic. To deal with this, just make sure that you aren’t overexposing anything in your frame – unless it is something so bright (like the sun or a lightbulb) that it has to be blown out. Bring your exposure down far enough that the bright areas of the frame still have detail in them, and that will already put you in a better place. What may happen then though, is your subject or foreground may be too dark in some areas. You then have the choice of either leaving it as is, and allowing your subject to be in silhouette, or alternatively you could bring in more light to fill out the scene and lift up the shadowy, darker areas.
6 – Framing
I can’t stress enough how important proper framing is to a cinematic image. So many of the things on this list (which are all equally important) get completely thrown out the window with bad framing. If you have a well lit shot with a nice shallow DOF, but the subject isn’t framed right, than everything else you’ve done gets diminished. Great framing not only will make your video feel more filmic, but it will make your film better as a whole. The framing of an image can tell a story in itself. Just take a look at this frame from The Kings Speech, where a very unusual framing was utilized to create a sense of emptiness in the characters life -

7 – Lighting
Great lighting can make or break your shot, no matter what medium you’re shooting on. That said, certain formats – especially film, are much more forgiving with poor lighting than digital. Some low budget filmmakers are tempted to just pick up a digital camera and start shooting without thinking enough about the lighting of their scenes. Doing this can be another huge giveaway of a very low budget and amateur production. You by no means need to spend a huge amount of your budget on lighting if you don’t have the money for it, but you need to pay as much attention to proper lighting as possible. Whether you’re shooting with a large lighting setup or just using bounce boards and practical lights, it’s the attention to detail that counts. No amount of color grading will ever be able to save a shot that is just poorly lit, so make sure that your shots are not only exposed properly, but also lit in a way that sets the mood and tone of your scene.
I’m not going to delve too deeply into specific lighting techniques as there are too many to address here, but check back soon as in the coming weeks I will be doing a lighting tutorial that will go into more detail on this.
8 – Color Correction
In post-production and specifically while color grading, you can do a lot to make your video look more filmic. Ideally you’ll want to decide on a look before hand and then bring your footage into some grading software (I recommend DaVinci Resolve, but anything will do really) and start to tweak your settings accordingly. A big mistake that I see often is amateur filmmakers will over-do the color on their film. They will go in and apply a heavily stylized look to every shot in the film, making it look more like a music video than a feature. A good starting point when coloring is to make your footage look as natural as possible. Once you’ve gotten your white balance and exposure to the right spot, you’re already most of the way there. Most films (action and horror genres aside) are actually not that stylized. They usually have very accurate colors and aren’t covered in a wash that makes them feel unnatural. With that said, feel free to add warmth or cool down your footage as needed to suit the mood of the film, just don’t go overboard.
You’ll also want to consider your black levels and contrast. Film can be noticeably lower contrast than video, and you can do a lot in post to achieve this look. First off you could try to simply reduce your contrast setting (but don’t go too far with it), and then lift your black levels just a touch. Make sure that your blacks aren’t too “crushed” (or dark) in the wrong areas, and you will be well on your way to finishing your film look. Take a look at this shot from Upstream Color which was graded quite well to look more filmic, and has some lighter black levels -

9 – Film Emulation
This is not a necessary step, but one that I feel can really put the icing on the cake after you’ve followed everything else on this list. Film emulation is a technique that literally allows you to apply the look of a specific film stock to your footage, adjusting the colors and grain to match that of your chosen film stock. Like color correction, you don’t want to go overboard with this technique, but when used tastefully it can make a world of difference. Right now the best software out there for emulating film stocks is FilmConvert. I’ve used it on many projects and it’s really quite good. It gives you full control over the film stock you would like to apply, as well as the amount of grain and even the film size (8mm, 16mm, 35mm, etc), amongst many other features.
Here is a quick before/after sample from a shot I ran through the software -
Before

After

No comments:
Post a Comment